Pinhole Camera — Basic Informations
Ivan Mikšík
The principle of the pinhole camera is very old, elder than photography. It is based on the principle
that light coming through the pinhole to the dark environment forms figure of outdoor world.
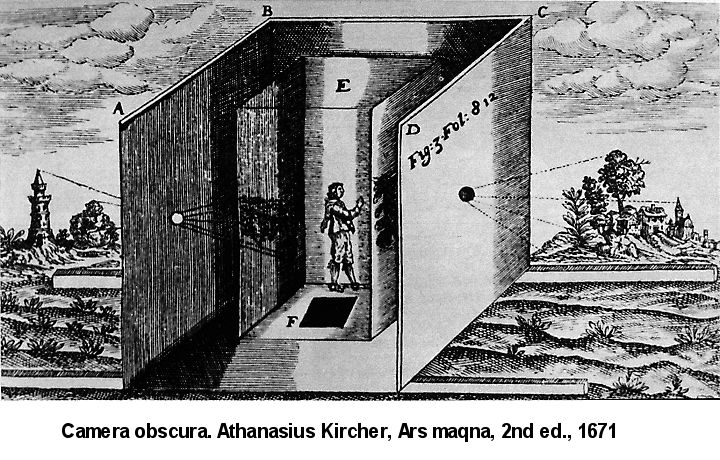
Pinhole camera has the same fundamental as Camera obscura, but Camera obscura was gradually
developed to the one with lens in the hole (Girolamo Cardano at 1550 was first who described
inserting the lens) and image was later projected to the screen. On this screen it was possible to observe
a image, to draw it, etc. From this reason Camera obscura was using mainly by painters.
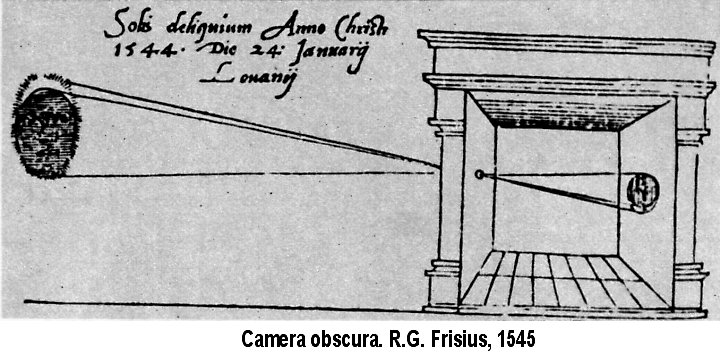
Pinhole effect (created by light coming through the pinhole) described Greek philosopher
Aristoteles (384-322 BC) when he studied partial Sun eclipse. At 11th century this effect was
described by Arabian mathematician and naturalist Abu Ali Alhazen (Ibn al Haitham) from Basra.
This way of study of sun eclipse was used by many scientists during next centuries.
The principle of Camera obscura (i.e. exactly pinhole camera) and principle of work with pinhole
was firstly described by Leonardo da Vinci (1452-1519). The development of Camera obscura
continued, e.g. Giovanni Battista della Porta (1538-1615) at 1588 mounted to pinhole refractor with
some lenses and correct position of picture was ensured by mirror. But we are far from pinhole
camera and so turn back.
The first photographic pinhole images probably came from the 1850's. In the 1890's
pinhole photography was widely used to achieve "atmospheric" soft focus imaging. The first
disposable camera "The Ready Fotografer" was pinhole, manufactured in 1892.
At present, as another old techniques, pinhole photography invoke a relatively great publicity. From the
interesting contemporary experiments we can mention Thomas Bachler who made pinhole images by
placing film in his mouth and forming his lips into a pinhole. Marcus Kaiser used holes in the
Berlin Wall as pinholes (a film holder he placed to one side of the hole) and photographed both
East and West Berlin. Dominique Stroobant made six-month long pinhole exposures of the sun
crossing the sky.
Before you make experiments with pinhole cameras you must think about some basic pinhole
features: images formed are soft due to the large amount of diffraction (edge effect) through the
small hole. When you enlarge this image the softness rapidly becomes unacceptance. For this
reason, most pinhole artists use medium or large format film where the enlargement is less
during the printing stage (often the image is made directly as contact).
Pinhole camera can be made by primitive resources. You can use any light-tight box
(e.g. plastic container). The most simple material for the hole is the thin aluminium sheets
(available in any supermarket). The hole you can make by a small sewing needle or pin. The best
way is cleaning the locality of hole by sandpaper and strengthen the hole by tape and pertinently
painting by black colour. The substantive features of pinhole is symmetry of this hole. It's not
necessary to use film, you can use also photo-papers. The determination of exposure you can
make by methods of trials and errors.
From the reason that light comes through the pinhole at about a 150 degree angle, the
diameter of the arising image is approx. 3-1/2 times the distance between film and
pinhole (focal length). It means that if you have 75 mm focal length you can get 250 mm wide
image, if you have 150 mm focal length you can get 500 mm wide image. If you change distance
between pinhole and film you can use wide angle- or "tele"-pinhole cameras.
Pinhole cameras are commercially available, mainly quite a few large format (120, 4"x5"
and larger). The simplest way to come to pinhole photography is turn your existing lens camera into pinhole. You must just
remove the lens and use a body cap with a large hole in it over which you have taped the
pinhole (for making pinhole see above). These pinholes are also available commercially.
The change of focal length (elongation) you can make by simple insertion of extension tubes.
If you decide you want a fairly sharp pinhole images, you will need to know that the
greater focal length, the larger the hole should be. For example: 1/4 mm hole for
35 mm focal length pinhole camera, 1/3 mm hole for
75 mm focal length pinhole camera, 1/2 mm hole for 150 mm focal length pinhole camera.
To make the image less sharp, the hole should be larger than the recommended
optimal size.
Here presented photos was made by method of transformation of reflex camera (Canon EOS300)
to the pinhole camera. The most exact method for estimation of exposure was trust to exposure
meter of camera (don't forget to block the introduction of light to the eye socket!). Naturally,
it is helpful to use bracketing.

Links to another pinhole photography
pages
Pinhole Resources
– very complex server about pinhole photography (many basic informations
about pinhole photography, pinhole books and journals, cameras, gallery etc.)
Pinhole Photography Day
My next pages